Sage 200 Report Designer has a number of functions that you can choose from. These can range from changing the layout of a report to match your company requirements to adding the company logo to a layout or adding additional sage fields in the report to get the most out of the reporting. However, these are just some of the basic functions of Sage 200 report designer.
This blog is going to outline some advanced functions in Sage report designer that can affect the appearance of your layout and hopefully make your job easier.
Report Designer Expressions
Expressions are a feature that can allow you to do lots of different things on layouts or reports. For example, you are able to create calculations by adding together different values in a layout or use conditional formatting based on other parameters in the layout.
You can use expressions to place conditional formats on a specific field so that if it is past a certain date it will turn red on the report, e.g. to show that it is overdue
First of all, to add an expression you will need to go to the Expression Editor. In order to do this, select the field you want to apply the expression to and go to the Properties panel on the right-hand side of your screen (if Properties isn’t there go to view and select properties). The top item in this panel is the Expression.

Click on the button with the 3 dots to open the Expression Editor.
You will then need to add the expression you want to use and then, in this example, add brackets around the field that you want to apply it to.
You can also find the expressions that you want from the box at the bottom right of this screen and then drag them into the editor. It is helpful to know what table the information is in to save time scrolling through the long lists.
If you start typing the expression you want similar ones will pop and you can select the required one from the list.

Once you have done that you can click OK and your expression will be applied to that field.
Case Specific Text
If you would rather certain text to always show as upper or lower case then you can write expressions to make this happen.
No Expression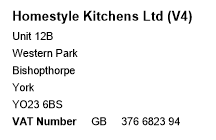
ToUpper(_)
This converts the field to upper case.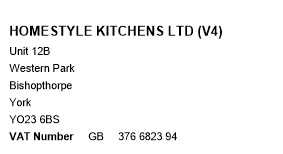
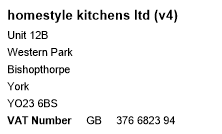
ToLower(_)
This converts the file to lower case.
If Statements
You are able to make fields do specific things based on the data in the fields by using an if statement. e.g. based on the id of a bank account on a transaction, this could pull through the name of the bank account for you.
If(_)
Displays certain values depending on the condition specified.
SumIf(_)
Totals only the values that meet the condition specified.
Rounding
On your layouts, you are able to specify how the numbers are formatted or rounded off. This can help you with the look and consistency of your layouts throughout your system.
Truncate(_)
Rounds the value to the nearest whole number in the direction of zero.
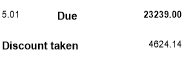
Celing(_)
The value is rounded up to the nearest integer.
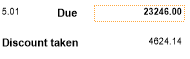
Floor(_)
Rounds the value down to the nearest integer.
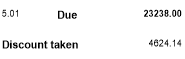
In conclusion, there are a number of different things that you can do within the Report Designer. However, this blog just covers a few that we think are useful to know about.
Fancy getting to know a bit more on Sage Report Designer? Why not take a look at our short e-course on Sage 200 Report Designer.
Alternatively, if you want to know about any other advanced functions in Sage 200 Report Designer, why not get in touch with one of our friendly team?


We are a multi-award-winning, platinum Sage Partner, specialising in Sage 200 Professional, Sage 200 Standard, Sage Intacct and Sage 50 accounting solutions.
At itas, we believe in working in partnership with you to deliver the perfect solution that you want and need. We will design a tailor-made business management solution specifically for you and your business, giving you the freedom to focus on what you do best.